Transferring Course Content Between Instructors and Courses
As an instructor using Carmen, at some point you may have found yourself wishing for an easier solution for recycling or reusing course materials that you have invested a lot of time and effort creating. Carmen includes integrated features that allow you to share and copy your content in a simple and efficient manner. Whether you want to make an individual page or an entire course available outside of a single course iteration, you can use the content that you have created in Carmen across multiple courses.
The sections below outline four different methods that can be used to transfer Carmen content. Each section contains a brief description that explains how the feature works, followed by step-by-step instructions. If you have any questions or concerns about how any of these processes work, schedule a consultation with one of our ODE instructional designers who can help you navigate and troubleshoot these features.
“Send To…”
To share course content including entire modules as well as individual course components like Pages, Discussions, Quizzes, or Assignments you can use the “Send To…” Carmen feature. This feature is best used to send content to another individual with similar access permissions. This feature is particularly a good option if you are looking to share a limited number of items.
From almost any course components such as Pages, Modules, Assignments, etc. that you wish to share, “Send To…” can be found in a dropdown menu indicated by the three vertical dots at the top right-hand corner of your Carmen course screen. The option appears alongside a head-and-shoulder icon within the dropdown menu.
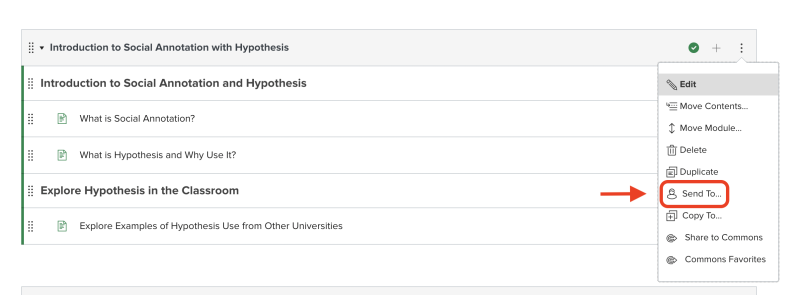
Click the “Send To…” option to get started and then follow these steps:
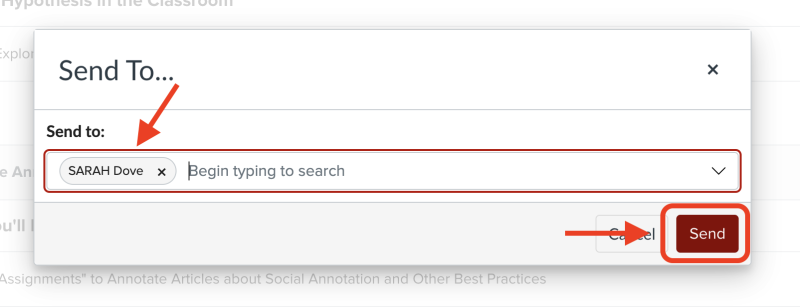
- The first thing you see will be a small pop-up window labeled “Send To…” with a text box that reads “Begin typing to search”. You can type an individual’s name (including your own), or you can enter an OSU name.# and Carmen should provide a list of possible search matches.
- From the list that appears, select the name of the person to whom you wish to send content.
- Then click on the red “Send” box in the bottom right-hand corner of the pop-up window.
At the top of your screen a message outlined in green that reads “Content share started successfully” should appear. When the share is complete, a small circle with a number will appear next to the recipient’s Account icon.
To find and open content that has been shared from the “Send to…” option follow these steps:
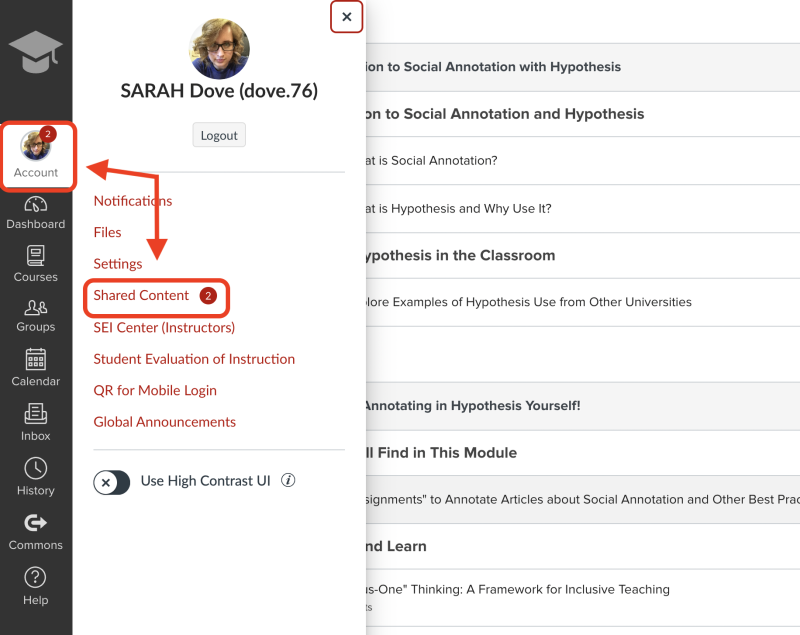
- Click on “Account” near the top of the navigation menu that appears on the left-side of your screen.
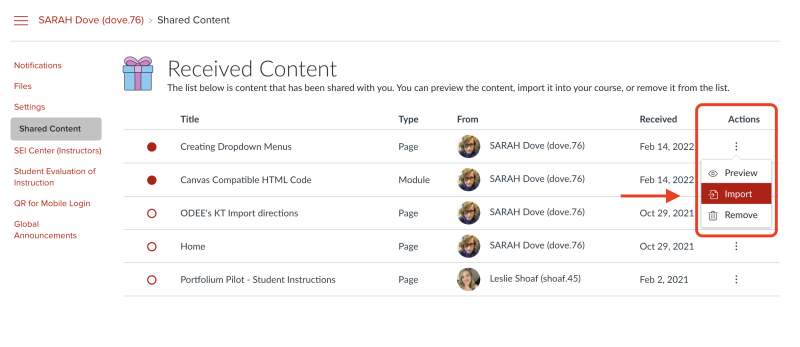
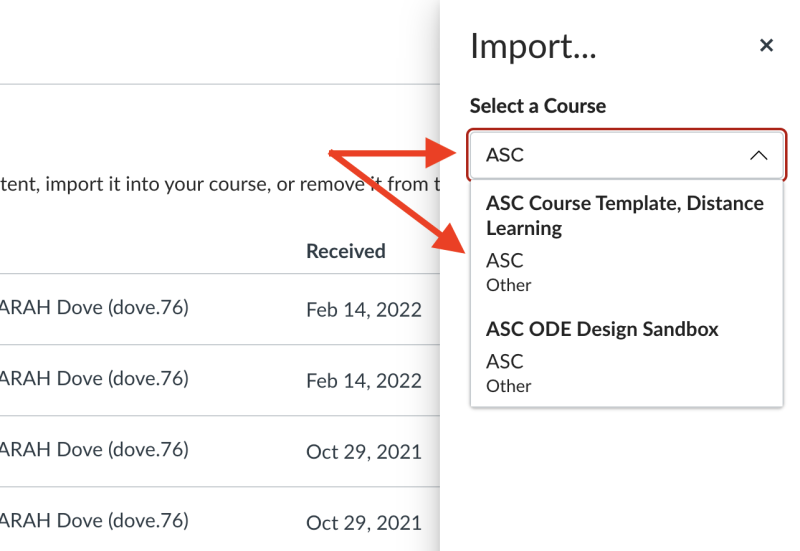
- Select “Shared Content.” This will take you to a page titled “Received Content.” From here you can see the title and type of content shared, as well as the individual that sent the content.
- Click the options menu (displayed with three vertical dots) under the last column labeled “Actions”. From here you can choose to “Preview,” “Import,” or “Remove” the shared item.
- To transfer the shared content into your course, select “Import”. This will open a menu on the right-hand side of the screen where you can select the course where you wish to import the content. If the shared content is a smaller component such as a Page or an Assignment, you can also select the existing Module where you want the content to reside.
You will be able to do this for any course where you have content creator permission (such as Teacher or Designer designations). Once the shared content has been moved into your own course, you will be able to edit and customize it as you see fit without effecting the original shared content.
“Copy To…”
The “Copy To…” option is the feature that functions most easily for pushing content from one course to another where you have Teacher or Designer permissions in both locations. It functions almost identically to the “Send To…” feature, but without the additional step of having to locate the content in your account and then push it out to the correct destination.
The “Copy To…” option can be found within the same dropdown menu that appears from clicking on the three vertical dots in the top right-hand corner of any individual component screen such as Modules, Quizzes, Discussions, etc.
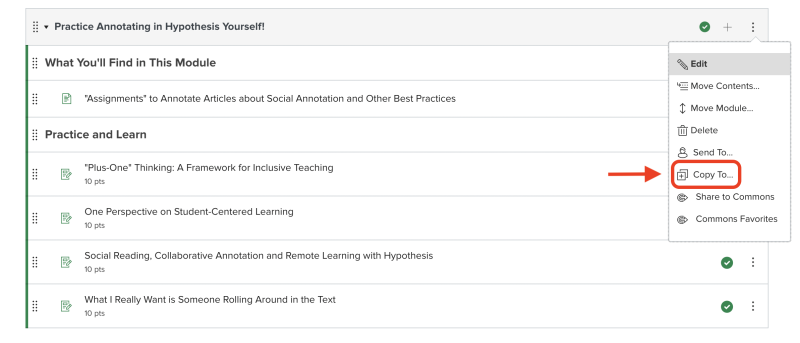
To get started, click the “Copy To…” option within the dropdown menu and then follow these steps:
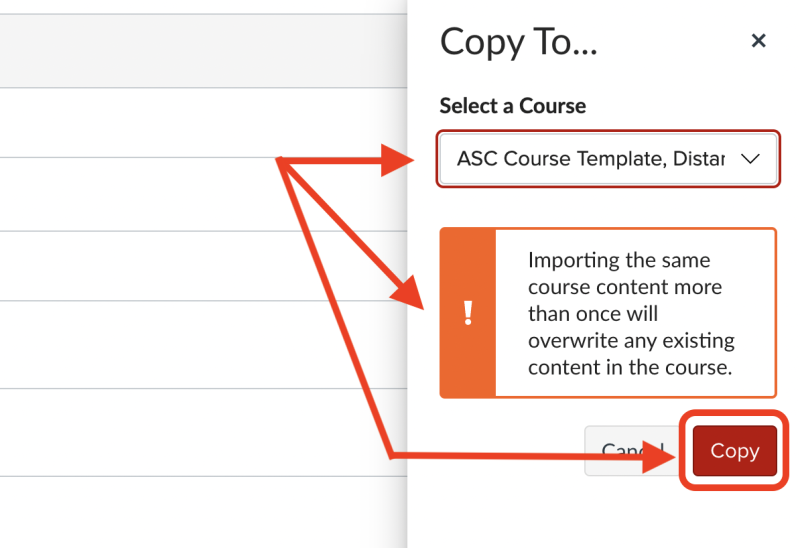
- Once you select the option, a menu labeled “Copy To…” will appear on the right-hand side of your screen, along with a text box that reads “Begin typing to search.” Here you will need to enter part or all of the course name where you wish to send the content.
- Since you may be listed in Carmen courses that have similar names, it is important to pay attention to the details of the selections that begin to appear.
- Also note the warning box outlined in orange with an exclamation point icon that appears here. This will alert you that if you share content more than once, or if previously shared content is part of a newly shared module, that sharing again will overwrite any edits that might have been made to the content after the original share.
- Once you have found the correct course, select the it. At this point, you may also choose to specify the existing module in which you would like this content to appear.
- Once you have selected your copy to destination, click the red “Copy” button at the bottom of the page.
At the top of the “Copy To…” menu on the right-hand side of your screen, you will receive a message that reads “Copy operation started successfully.” You should then be able to navigate to the course where you have copied the content and locate it accordingly. Sometimes this can take a few minutes or longer, but the copied content should generally be available in a very short amount of time.
Bulk Importing Select Content
There is also a means to select content in bulk to move from one course to another. For example, you may want to move core content created via Pages from an active or past course but create Assignments that are specific to a new course that you are building. Or maybe you would like to create Quizzes using Question Banks that you have carefully built in one course and transfer them to another. Carmen provides a feature that allows you to move entire groups of content all at once without copying the entire course.
To do this, you need to ensure that you are granted Teacher or Designer permissions in both the course from which you are pulling the content and the destination course where you want the content to be accessible. From inside the destination course, you will:
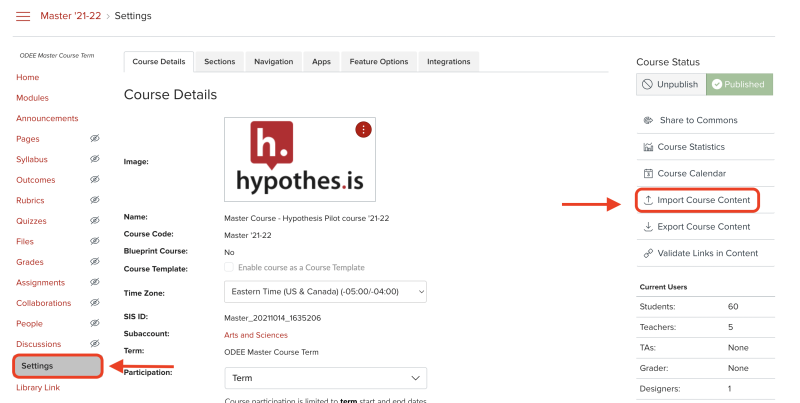
- Click Settings, located at the bottom of the course navigation menu on the left-hand side of the screen.
- From the Settings page, select “Import Course Content” from the menu displayed on the right-hand side of your screen.
- From the “Content Type” drop down that appears near the top of the screen, select “Copy a Canvas Course.” You can use the dropdown menu to view and select a course from a list of all your Carmen courses, or you can use the search box to type the name of the course from which you want to copy content.

- In the next section titled “Content,” make sure that the “Select specific content” bubble is selected.
- Note, if you are importing Quizzes, graded Discussions, or Assignments, you can also select the box labeled “Adjust events and due dates” and Carmen will automatically approximate the due dates based on the start and end dates that are set by default when the course shell is created. If your course aligns in timing this is a valuable shortcut, though some adjustment might still be necessary.
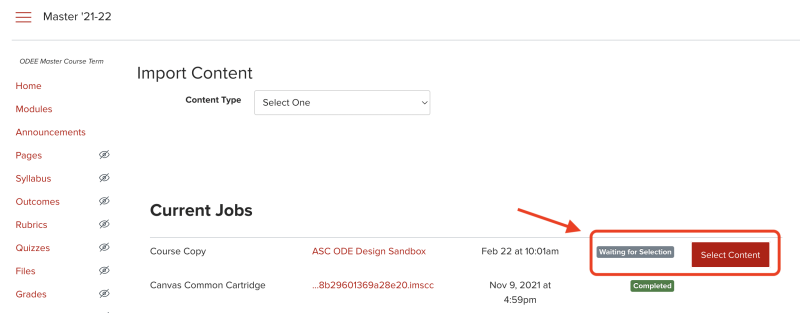
- Next, click the red “Import” button. This will populate a “Current Job” at the top of the import queue at the bottom of the page.
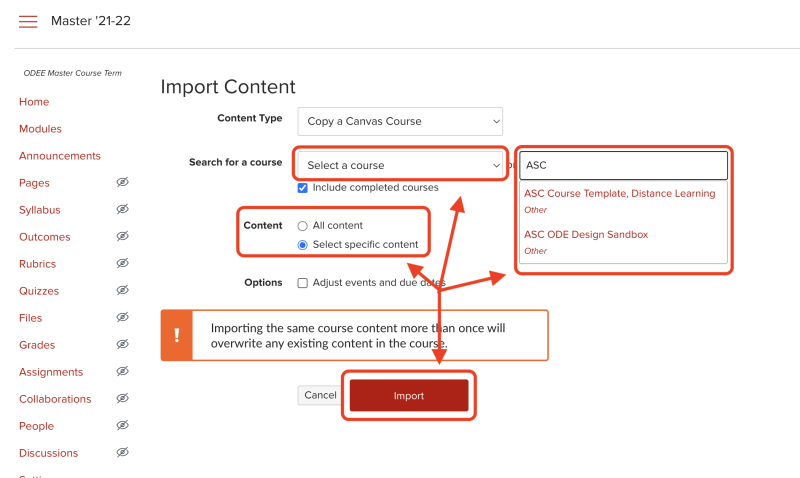
- Under “Current Jobs”, you will see the import job with a grey bar at the far right-hand side that says “Waiting for selection” and a red “Select Content” button. Click on that red button to proceed.
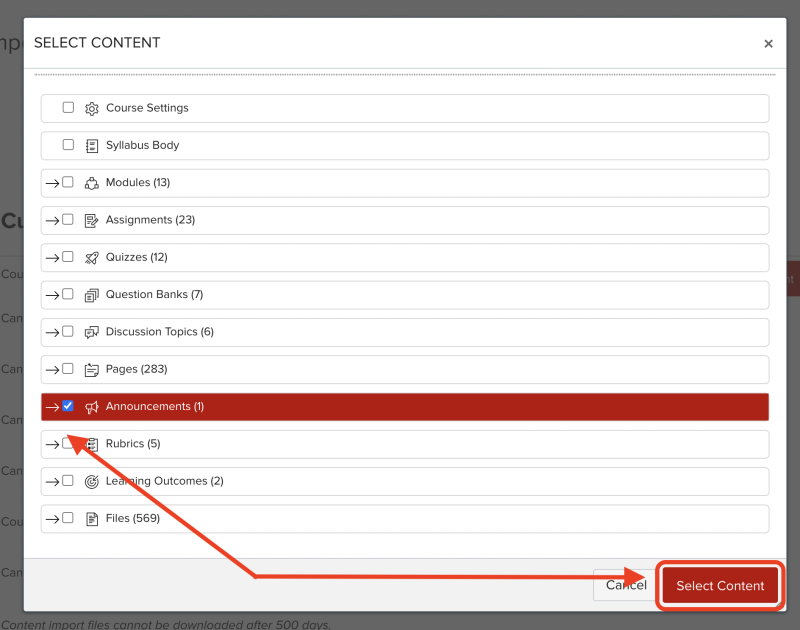
- From the list that appears, you can select the course components that you wish to import, such as Course Settings, Rubrics, Question Banks, Pages, Files, and more. You can select multiple components to migrate at once.
- Finally, after making your selections by checking the appropriate boxes from the content list, hit the red “Select Content” button and your import will begin.
This content should not take long to import and will largely depend on how much content is being moved. Once the import is done a green status bar with the word “Completed” will appear on the far right-hand side of this same screen. If there was any problem with your content migration, the bar will be yellow and will show you the number of issues that occurred via a link to the right of the status bar. Clicking on that link will reveal a detailed list of issues that you may need to repair.

One common issue that often occurs is missing or broken links. You can check these all at once using the course link validator when your content building process is complete or when you are at a stage of near completion and want to check on your internal and external course links. For more information about how to use the link validator, check out ODE’s “Validating Course Links resource. It is also always a good idea to check the settings of your imported content since some features—such as Group settings and Calendar items—do not transfer when importing external content. For example, if your imported content was built using an External Tool, you may need to check its configurations to ensure the transition from one location to another has gone smoothly.
Another consideration you may need to account for is that the course size limitation may not meet the parameters necessary to use this feature. You can find information regarding course storage size under Settings. Anything over 500MB will prompt an error and will not import/export. If you are having issues with this feature, the instructional design team at ASC ODE is happy to help you troubleshoot.
Whole Course Export / Import
If you, like many instructors at OSU, use a Master course shell to build your course content so that you can experiment with and tweak design settings and arrangements, you may benefit most from the export package feature in Carmen. Assuming that your design is complete or mostly complete – or in the event that you are teaching the same course with minimal change from one academic year to the next – you can export your course via a .zip file and import the contents contained in that file into your new course shell.
If you are exporting from one course into another, this feature does not retain student data. Some of the limitations discussed in the section above also apply here (see the last two paragraphs regarding course size limitations and External Tool configurations, in particular). If any of these limitations pose a potential problem for the smooth migration of your materials, consider sharing your content via the “Copy To…” function detailed above as an alternative.
If your course is under 500MB and you have largely built your content using Carmen features, you can export your content by:
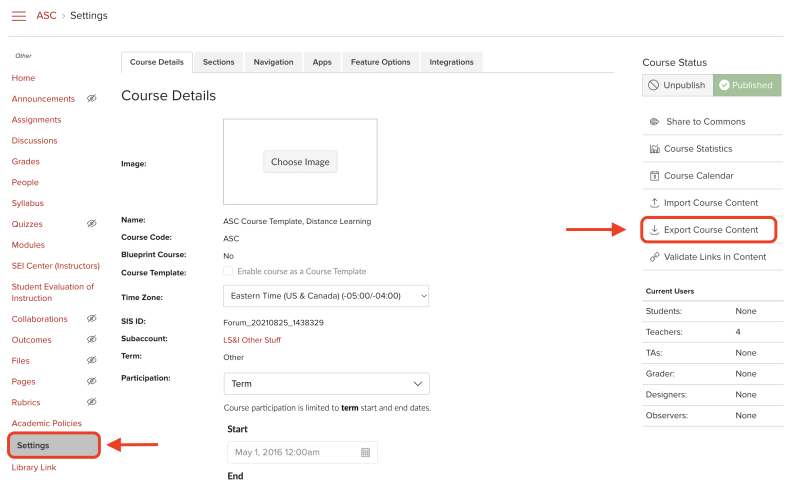
- Opening the course from which you would like to export content and clicking the Settings option near the bottom left of your screen.
- From the Settings page, select “Export Course Content” from the menu on the right-hand side of your screen. This will take you to a page titled “Content Exports.”
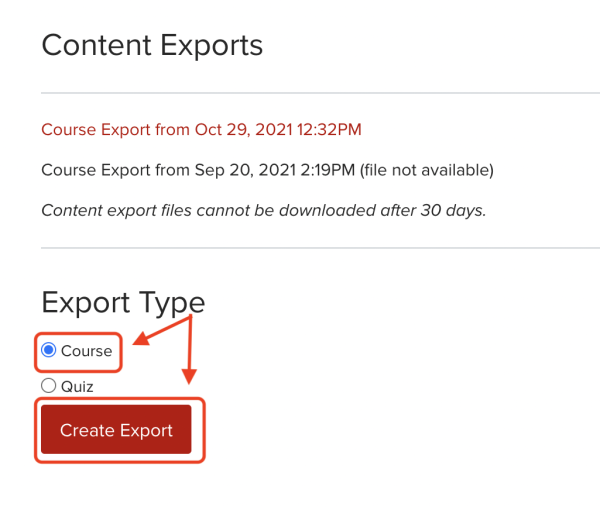
- Scroll down to the bottom of the page where you can see the heading “Export Types.”
- If you have previously exported your entire course, or your course quizzes, a full list of those exports will appear.
- Note: export packages are available for 30 days for download. After that time, you will have to create a new course export.
- At the bottom of the page, select the radio bubble next to “Course” then click on the red button that says “Create Export.” This will generate a progress bar where you can view the export being prepared. It will also display a message that reads “The export process has started. This can take awhile for large courses. You can leave the page and you will receive an email when the export is complete.”
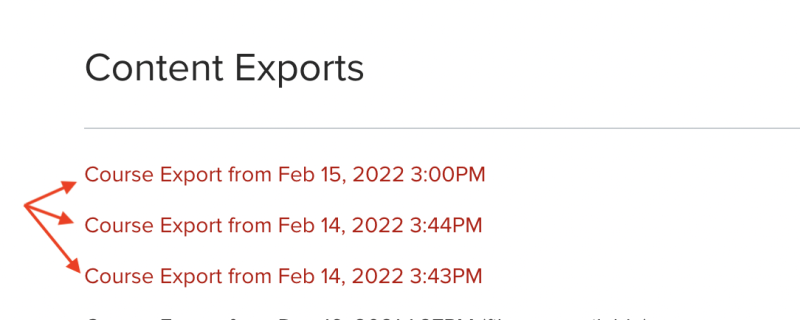
- Once you are notified that the export is complete, the export will appear as a link on the “Content Exports” page. Click on the link to download the course content package. (Note: If you have navigated away from the “Content Exports” page, follow steps 1-3 to return.)
Now you are ready to begin the import process from within the destination course.
- Open the course where you wish to import the content that you exported in the previous steps.
- Click Settings, located at the bottom of the course navigation menu on the left-hand side of the screen.
- From the Settings page, select “Import Course Content” from the menu on the right-hand side of your screen.
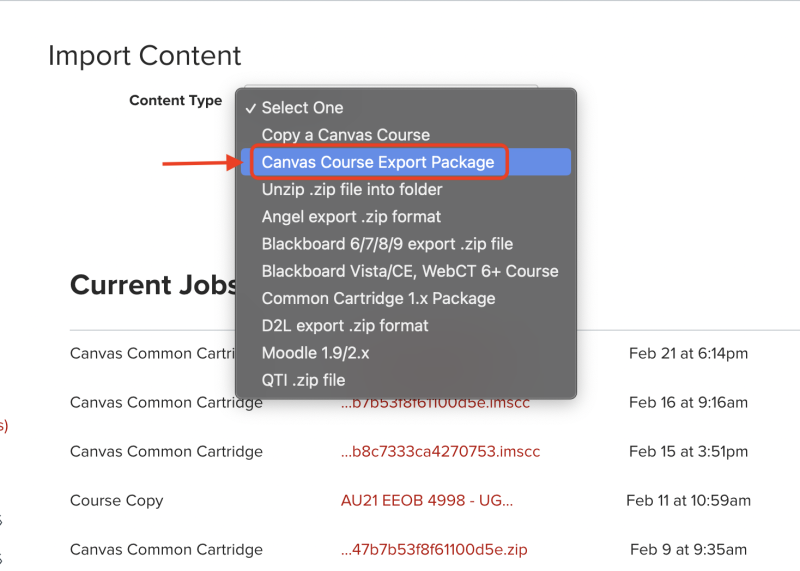
- From the “Content Type” drop down, select “Canvas course export package.” This will populate additional selection options.
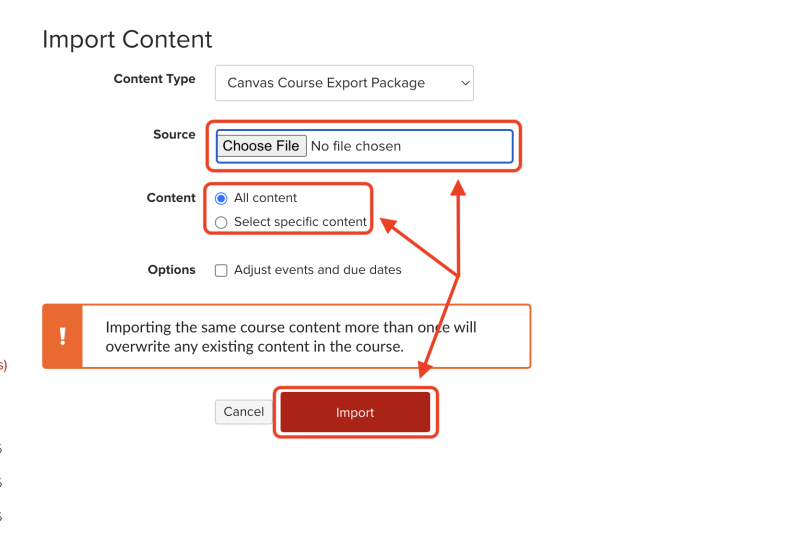
- For source, click on “Choose File” to select your exported content file from your computer’s download files.
- From here you can select “All content” to transfer all of the exported content, or you can choose to “Select specific content” and follow steps 5-9 listed in the “Bulk Importing Select Content” section above.
- Once you have made your selections, click the red “Import” button and your import will begin.
If you selected “All content,” the import can take a while. The colored progress bar on the far right of the queued job will show you when the process is complete. Once you receive this notification, you can edit content to be specific to the intended audience. Should you encounter any issues with this process, you can reach out to one of our Instructional Designers for support. The ASC ODE design team are well versed in this process.